
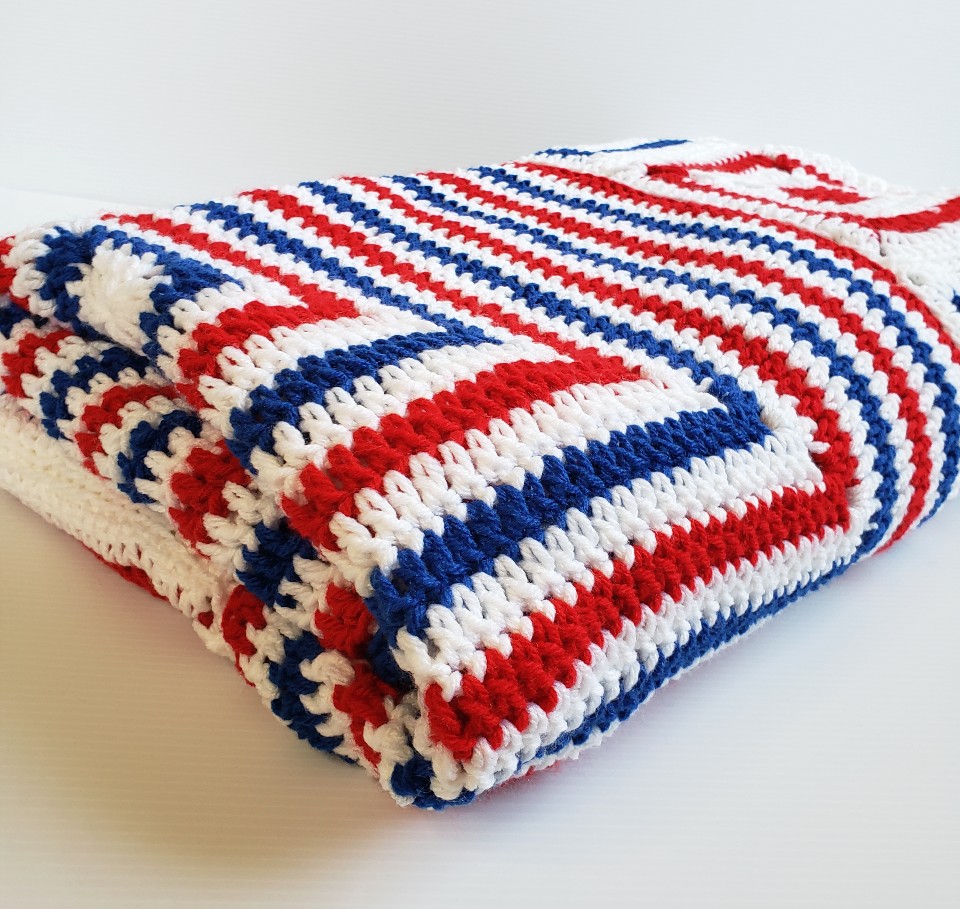
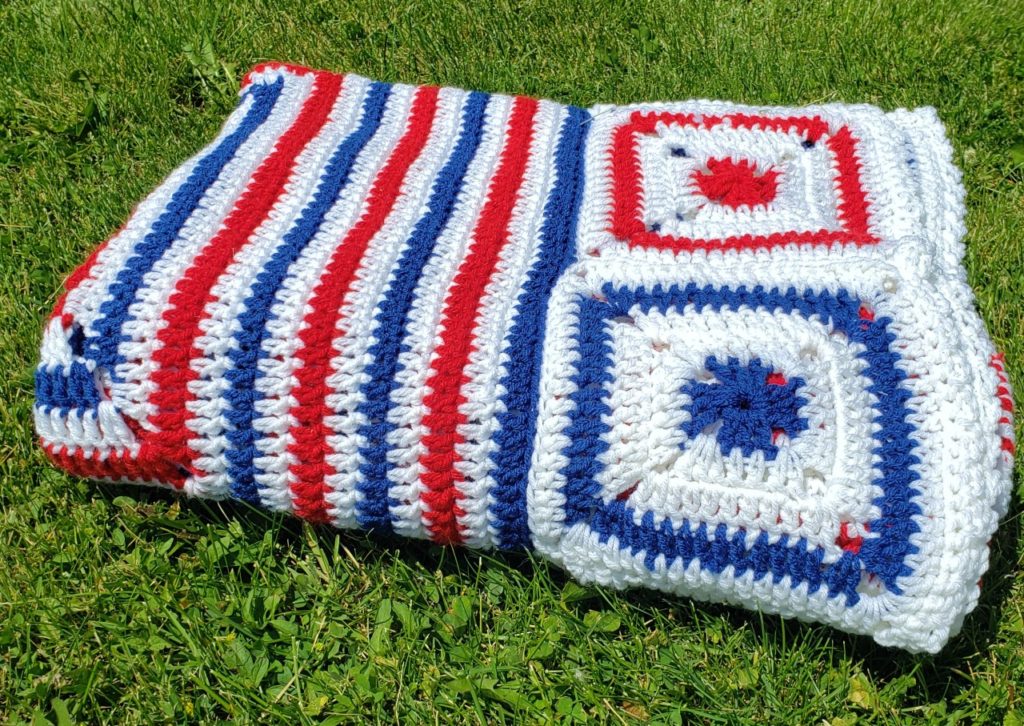
I live in Wisconsin, so when summer comes around I’m super excited for the warmer weather and longer days of sunshine not to mention the patriotic holidays we celebrate (Memorial Day and 4th of July)!!! This granny square blanket was inspired by those holidays. I love the red, white and blue together and so this blanket was fun to design.

This granny square pattern design is dedicated to my mom! When she was pregnant with me, she made this massive red, white, and black granny square blanket that is still around today. She designed it on her own. I LOVED the design so much that I wanted to do something similar with some modifications. It was a lot of fun talking through the blanket design with her and to get her input! Thanks Mom!!! 💓💓
Project Design
The granny square blanket was created using an H (5 mm) hook and Red Heart worsted weight yarn. It worked up rather quickly once I had the design down. At the beginning I ended up having to modify. I calculated and thought I had enough small granny squares to surround the larger squares. But I was way off. I ended up having to do double the amount of small squares I crocheted!
What I love about a granny square project is that you are able to take this project with you anywhere. I ended up bringing it in the car on more than one occasion as we were driving somewhere. And I brought it over to family’s houses if we were going to be staying a while! I love having a project that is easy to take anywhere.
Let’s get to the pattern…
This post contains affiliate links.
You can see a free copy of the crochet granny square blanket pattern below or if you’d like a formatted PDF printable with step by step instructions of the pattern you can get it from my Etsy shop here.
Step By Step Tutorial For The Solid Granny Square Blanket
***This post begins with the step-by-step tutorial; please keep scrolling DOWN for the free crochet pattern with everything written out
For both the 2 large squares and 28 small squares you’ll be using the same stitch pattern.
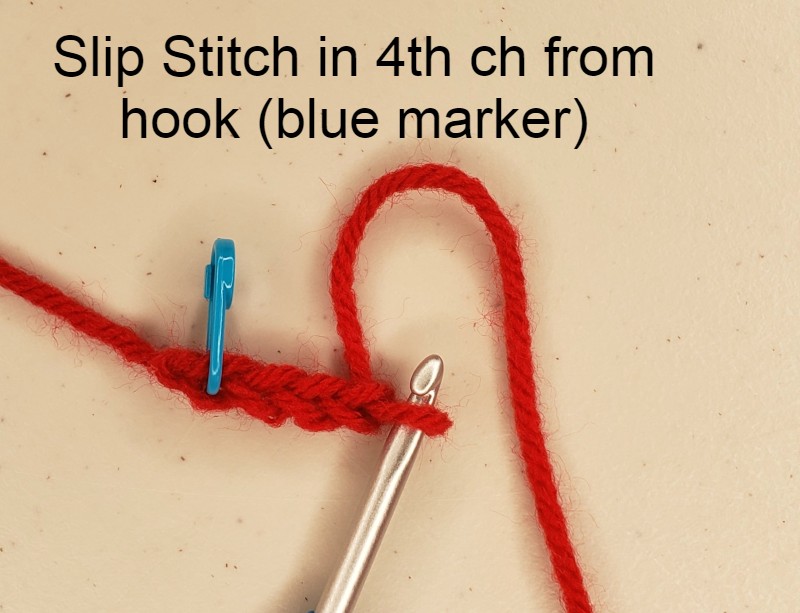
You’re going to chain 4. Then slip stitch into the 4th chain from the hook.
Chain 5. Then you’ll do 3 double crochets and 2 chains into the ring. You’re going to repeat the 3 double crochets and 2 chains 3 times.

On the 4th side of the square, you’ll do 2 double crochets into the ring. Then you’ll slip stitch into the 3rd chain from the beginning of the round.


2nd round: Slip stitch into the next chain and if changing colors here’s where it’ll happen. Then you’ll chain 6 and do 2 double crochets in the chain space.

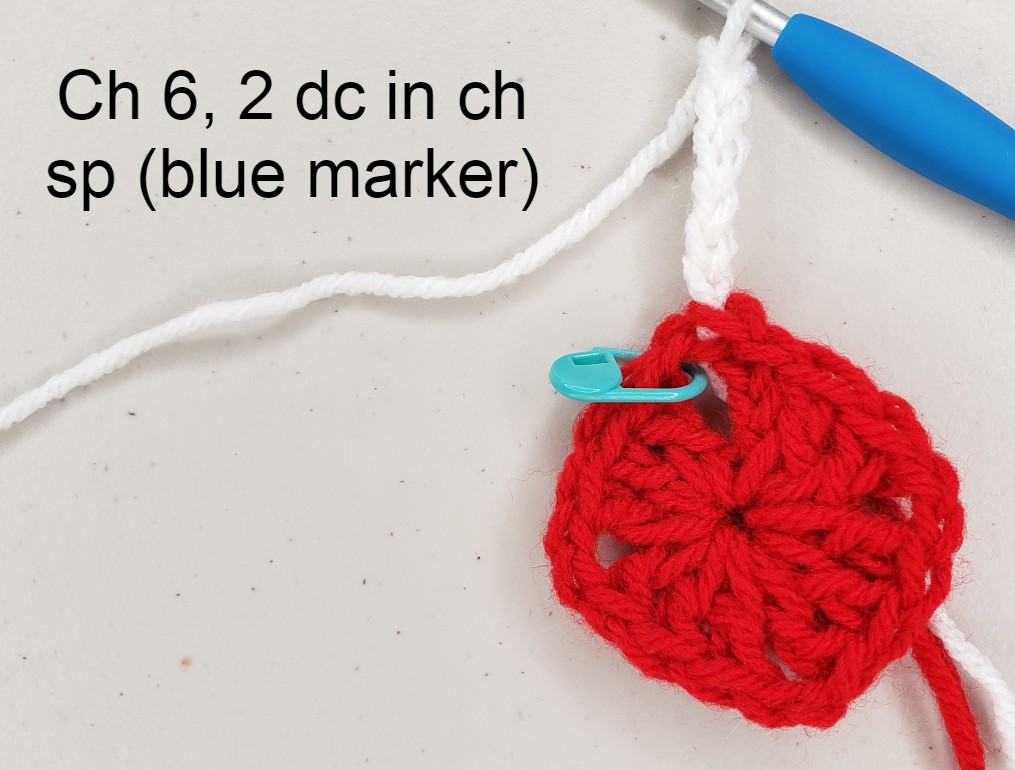
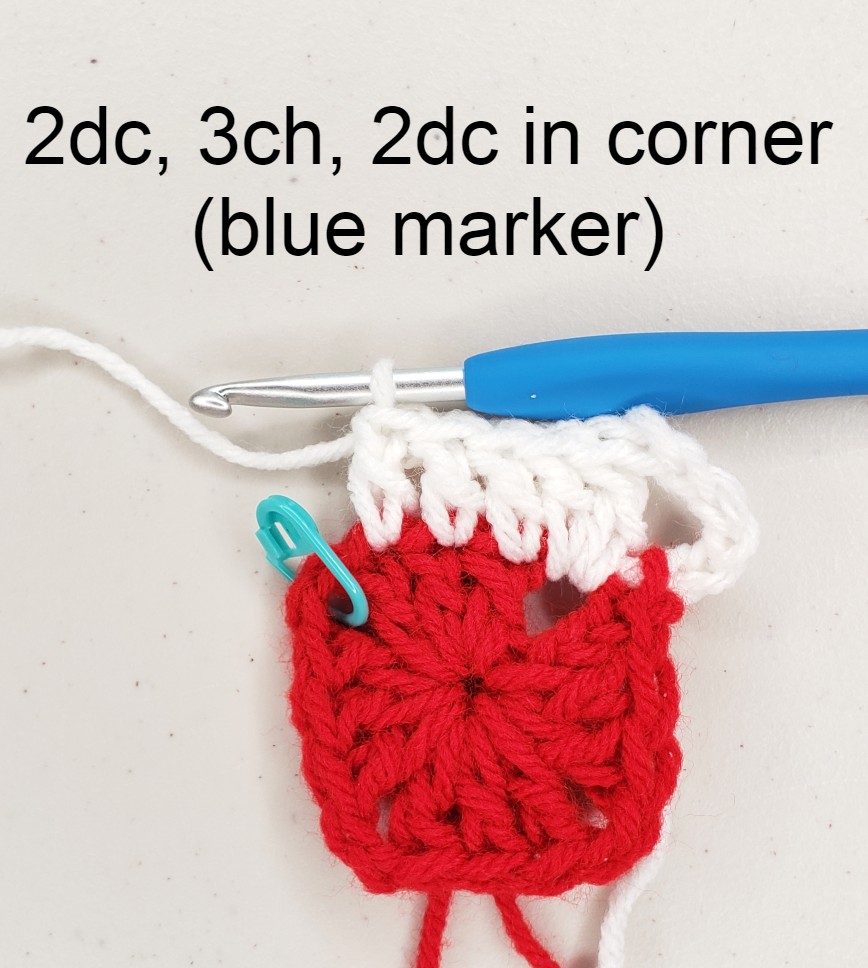
Now you’ll do one double crochet in each stitch across. Tip: make sure not to skip over the first stitch; it can sometimes get covered up when you’re doing the 2 double crochets in the chain space. In the next corner, you’ll do 2 double crochets, 3 chains, and 2 more double crochets.

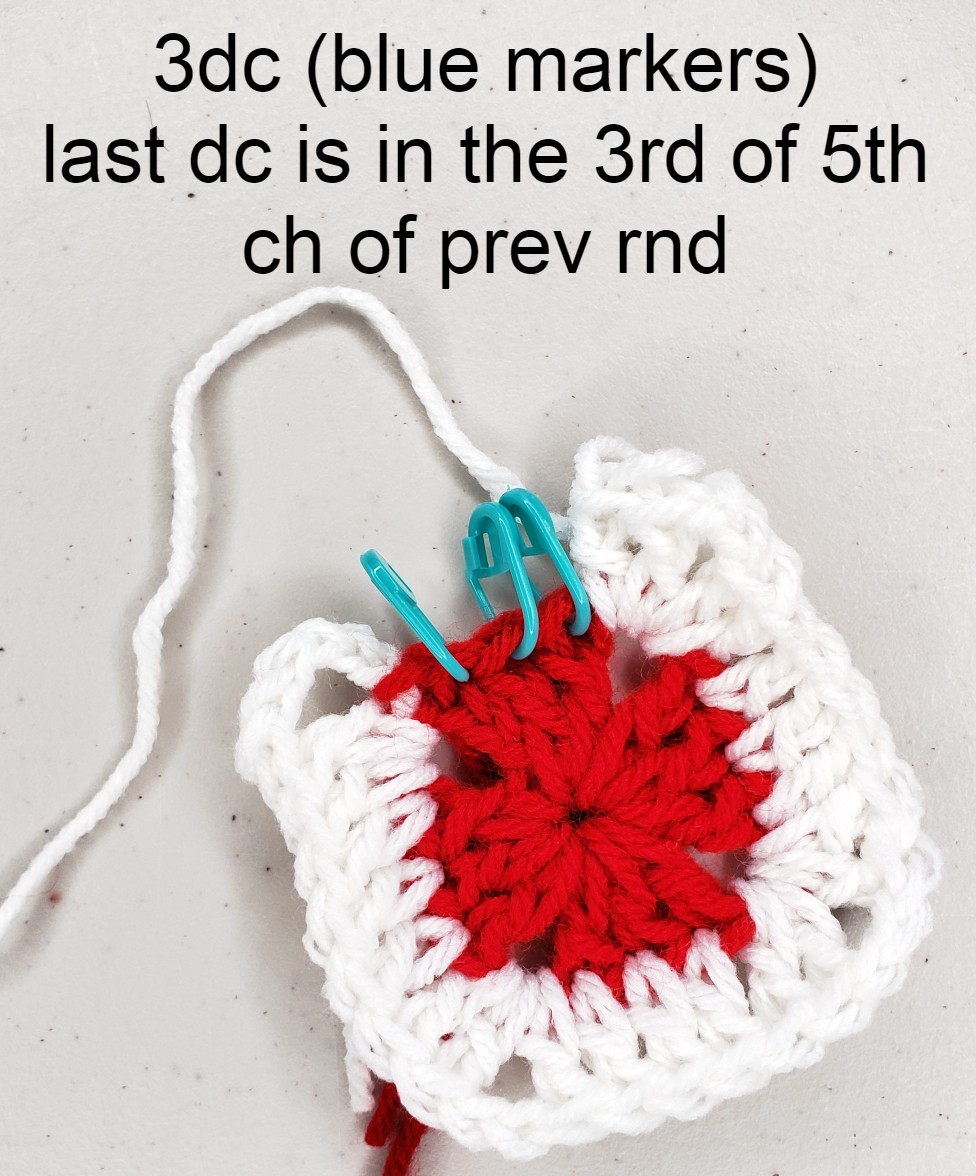
Now you’re on the last side of the square. You’ll want to do 3 double crochets. The last double crochet will be in the 3rd chain of the 5 chains we did in the previous round.
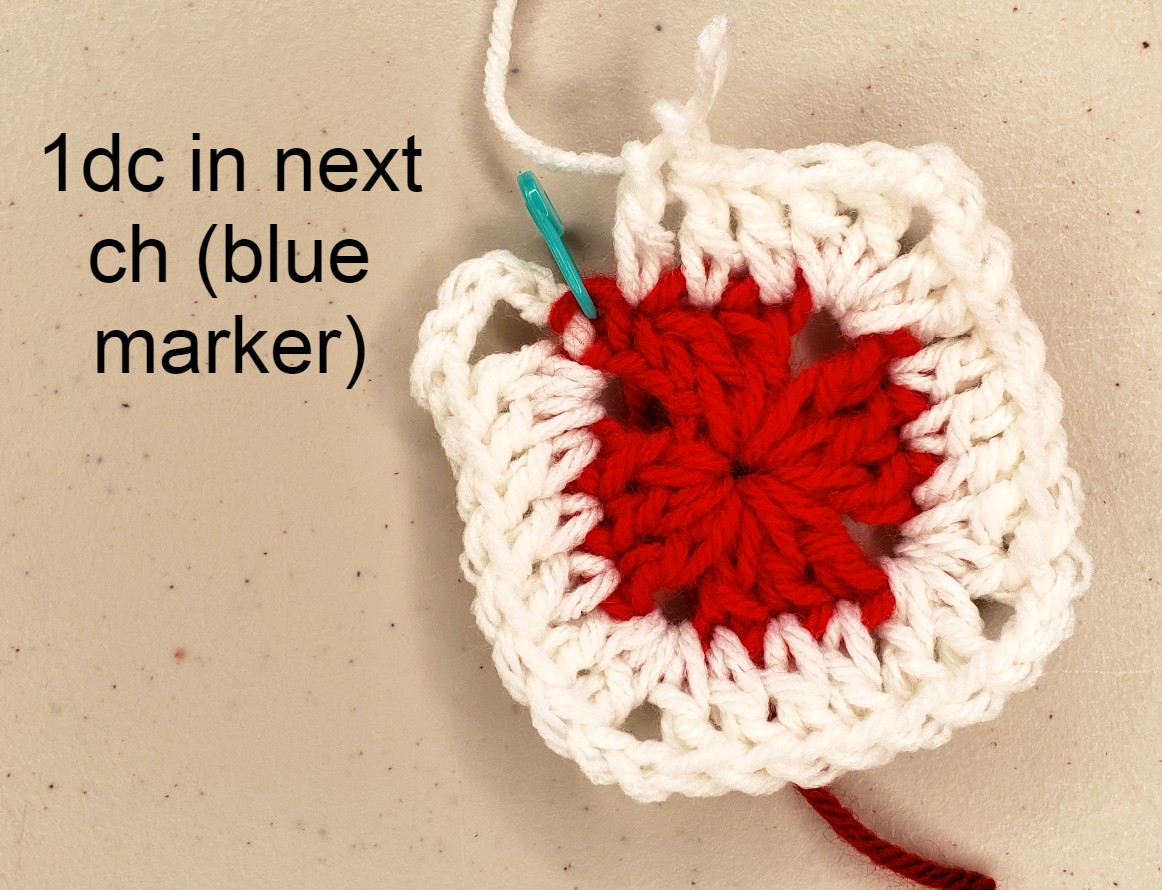
Next you’ll do 1 double crochet in the next chain. And after that you’ll do a slip stitch in the 3rd chain of the 6 chains from the beginning of the round.

For the beginning of the next round, you’ll slip stitch into the next chain (and change color if needed). And that’s it, you’ll just continue following that same pattern and add extra double crochets with each round.

For joining the squares together, you’ll be using the slip stitch method. It’ll be placing the hook in the front loop for the square closest to you and the back loop for the square farther away.

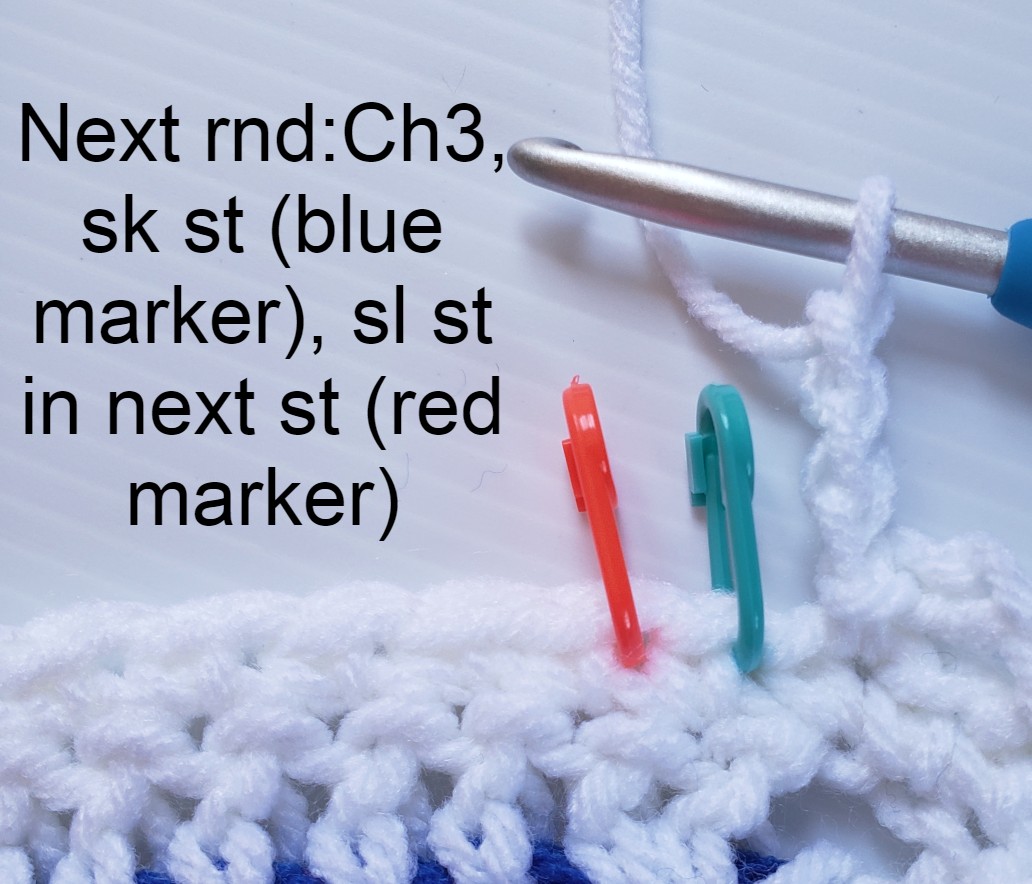
For the border, I first did a round of single crochets around the entire blanket (with 3 single crochets in each corner to prevent curling). Then the next round is 3 chains, skip a stitch and slip stitch in the next stitch around the entire blanket.
Pattern Instructions – Summer Celebration Granny Square Blanket
CROCHET / SKILL LEVEL
Easy
MATERIALS
Size: US H/8 (5 mm) crochet hook or size needed to obtain gauge (I used CLOVER 1047/H Deep Blue Amour Crochet Hook, Size H, 5.0mm)
Red Heart® “ Super Saver®” 7 oz / 198g; 364 yds/333m
Color A: 3 skeins 311 White (RED HEART Super Saver Yarn, White)
Color B: 1 skein 319 Cherry Red (RED HEART Super Saver Yarn, Cherry Red)
Color C: 1 skeins 385 Royal (Red Heart Super Saver Economy Yarn, Royal (E300.0385))
Notions: Yarn Needle
ABBREVIATIONS
Approx = Approximately
Beg = beginning
Ch = Chain(s)
Dc= Double Crochet
Prev = Previous
Rnd(s) = Round
Rem = Remaining
Rep = Repeat
RS = Right Side
Sc = Single Crochet
Sk = Skip
Sl st – Slip Stitch
Sp = Space
St(s) = Stitch(es)
Tog = Together
WS= Wrong Side
Yoh = Yarn over hook
MEASUREMENTS
Total Blanket: Approx 43.5” x 76.5” (110.49 cm x 194.31 cm)
Large Square: 29” x 29” (73.66 cm X 73.66 cm)
Small square: 7.5” x 7.5” (19.05 cm x 19.05 cm)
GAUGE
10 dc X 6 rows = 4” (10 cm)
PATTERN INSTRUCTIONS
Notes:
- Pattern is written using American terms.
- Chain stitch at beginning of round counts as stitch unless otherwise specified.
- All squares are crocheted using the same stitch pattern; large squares are 20 rounds and small squares are 5 rounds.
- Blanket consists of 2 large squares and 28 small squares.
- The large squares will alternate between all 3 colors.
- The small squares are made using 2 colors: white and then either red OR blue.
- For the 2 large squares, both start with white as the beginning color. But then for the next round, one square will change to red and the other square will change to blue. And you’ll rotate through all 3 colors. .
- For the small squares, it starts with either the blue or red yarn. There are 14 squares for each color.
- The color changes happen for each round while pulling the loop through the first sl st of the round.
- Make sure you don’t accidentally skip the first dc st on each side. Sometimes this st can be hidden by the sts made into the corner space. So, pull back the stitches made into the corner to find the first stitch on each side.
- Blocking can be done before joining squares.
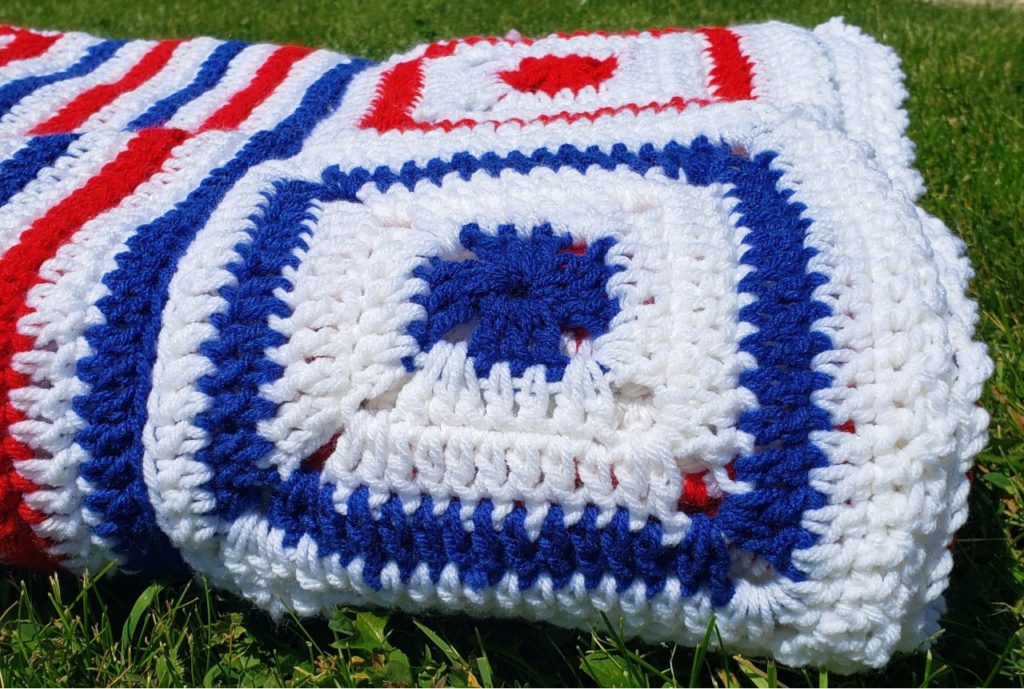
Large Squares (make 2)
With color A, ch 4. Join with sl st in first ch to form a ring.
Round 1: (RS) Ch 5 (counts as dc plus 2 for corner), [3 dc into ring, 2 ch] 3 times, 2 dc into ring, 1 sl st in 3rd of the 5 ch at the beg of the round. (12 sts, 4 ch-2 spaces)
Round 2: 1 sl st in next ch while changing to color B, ch 6 (counts as dc plus 3 for corner), 2 dc in first ch sp. *1 dc in each of 3 dc, [2 dc, 3 ch, 2 dc] in ch sp, rep from * 2 more times, 1 dc in each of 2 dc, 1 dc in 3rd of ch 5 at the beg of prev rnd. 1 dc in next ch, 1 sl st in 3rd of ch 6 at beg of this rnd. (28 sts, 4 ch-3 spaces)
Round 3: 1 sl st in next ch while changing to color A, ch 6 (counts as dc plus 3 for corner), 2 dc in first ch sp. *1 dc in each dc to next corner, [2 dc, 3 ch, 2 dc] in ch sp, rep from * 2 more times, 1 dc in each dc along 4th side, 1 dc in 3rd of ch 6 at the beg of prev rnd. 1 dc in next ch, 1 sl st in 3rd of ch 6 at beg of this rnd. (44 sts, 4 ch-3 spaces)
Round 4: 1 sl st in next ch while changing to color C, ch 6 (counts as dc plus 3 for corner), 2 dc in first ch sp. *1 dc in each dc to next corner, [2 dc, 3 ch, 2 dc] in ch sp, rep from * 2 more times, 1 dc in each dc along 4th side, 1 dc in 3rd of ch 6 at the beg of prev rnd. 1 dc in next ch, 1 sl st in 3rd of ch 6 at beg of this rnd. (60 sts, 4 ch-3 spaces)
Round 5: 1 sl st in next ch while changing to color A, ch 6 (counts as dc plus 3 for corner), 2 dc in first ch sp. *1 dc in each dc to next corner, [2 dc, 3 ch, 2 dc] in ch sp, rep from * 2 more times, 1 dc in each dc along 4th side, 1 dc in 3rd of ch 6 at the beg of prev rnd. 1 dc in next ch, 1 sl st in 3rd of ch 6 at beg of this rnd. (76 sts, 4 ch-3 spaces)
Rep rnds 2-5 alternating between colors. Finish off after completing round 20 (316 sts, 4 ch-3 spaces).
On each round, 4 extra dc are worked on each side of the square (total of 16 dc added per round).
Small Squares (14 of red/white & 14 blue/white)
With color B, ch 4. Join with sl st in first ch to form a ring.
Round 1: (RS) Ch 5 (counts as dc plus 2 for corner), [3 dc into ring, 2 ch] 3 times, 2 dc into ring, 1 sl st in 3rd of the 5 ch at the beg of the round. (12 sts, 4 ch-2 spaces)
Round 2: 1 sl st in next ch while changing to color A, ch 6 (counts as dc plus 3 for corner), 2 dc in first ch sp, *1 dc in each of 3 dc, [2 dc, 3 ch, 2 dc] in ch sp, rep from * 2 more times, 1 dc in each of 2 dc, 1 dc in 3rd of ch 5 at the beg of prev rnd. 1 dc in next ch, 1 sl st in 3rd of ch 6 at beg of this rnd. (28 sts, 4 ch-3 spaces)
Round 3: 1 sl st in next ch, ch 6 (counts as dc plus 3 for corner), 2 dc in first ch sp. *1 dc in each dc to next corner, [2 dc, 3 ch, 2 dc] in ch sp, rep from * 2 more times, 1 dc in each dc along 4th side, 1 dc in 3rd of ch 6 at the beg of prev rnd. 1 dc in next ch, 1 sl st in 3rd of ch 6 at beg of this rnd. (44 sts, 4 ch-3 spaces)
Round 4: 1 sl st in next ch while changing to color B, ch 6 (counts as dc plus 3 for corner), 2 dc in first ch sp. *1 dc in each dc to next corner, [2 dc, 3 ch, 2 dc] in ch sp, rep from * 2 more times, 1 dc in each dc along 4th side, 1 dc in 3rd of ch 6 at the beg of prev rnd. 1 dc in next ch, 1 sl st in 3rd of ch 6 at beg of this rnd. (60 sts, 4 ch-3 spaces)
Round 5: 1 sl st in next ch while changing to color A, ch 6 (counts as dc plus 3 for corner), 2 dc in first ch sp. *1 dc in each dc to next corner, [2 dc, 3 ch, 2 dc] in ch sp, rep from * 2 more times, 1 dc in each dc along 4th side, 1 dc in 3rd of ch 6 at the beg of prev rnd. 1 dc in next ch, 1 sl st in 3rd of ch 6 at beg of this rnd. (76 sts, 4 ch-3 spaces)
Finish off.
For color C, use in place of color B in instructions.
Joining Granny Squares using Slip Stitch method
- Create a slip knot on the hook.
- Place squares with front sides facing tog.
- Place hook under front loop of square closest to you and under back loop of the farther square and sl st the squares tog.
- Continue across the row.
- Follow the same process until all squares are stitched together.
Here’s my layout for the blanket:

Border:
- Join with sl st in any dc and ch 1. Work sc in each dc around the entire blanket. In corner sts, do 3 sc to prevent curling.
- Once around, sl st into beg ch of border.
- Ch 3, sk 1 sc, sl st in next st around the entire blanket. Once around, sl st into bottom of the first ch 3. Yoh and pull through rem loop on hook. Finish off.
Finishing:
Weave in any remaining ends.
Permissions + Copyright:
Please do not publish or share this pattern as your own. You may make items to sell with this pattern. In exchange, please link back this post. Do NOT use my photos as your own sales photos.
I would love to get your feedback since I’m new pattern designing! Reach out with any questions or comments.
Have an amazing day!
Heather
If you like this granny square crochet pattern and want to stay connected, sign up for my newsletter!