
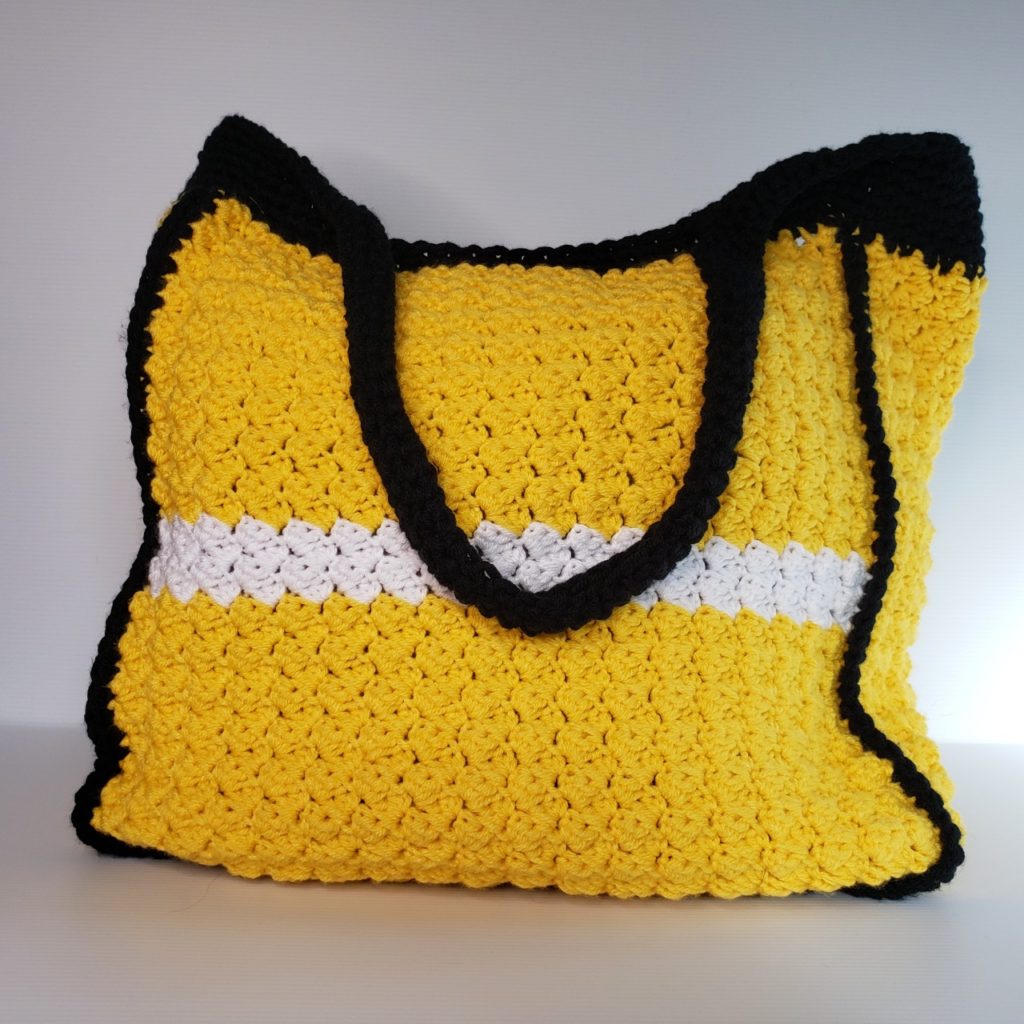
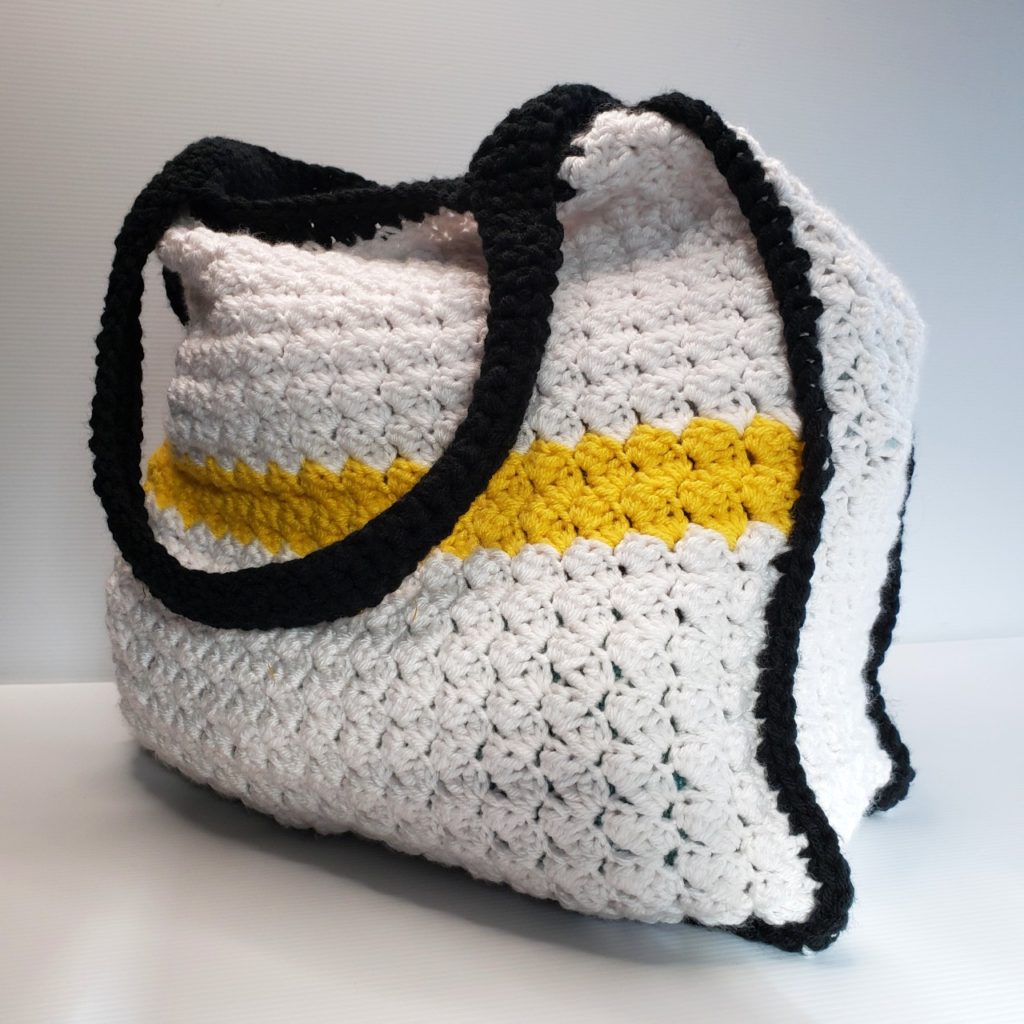
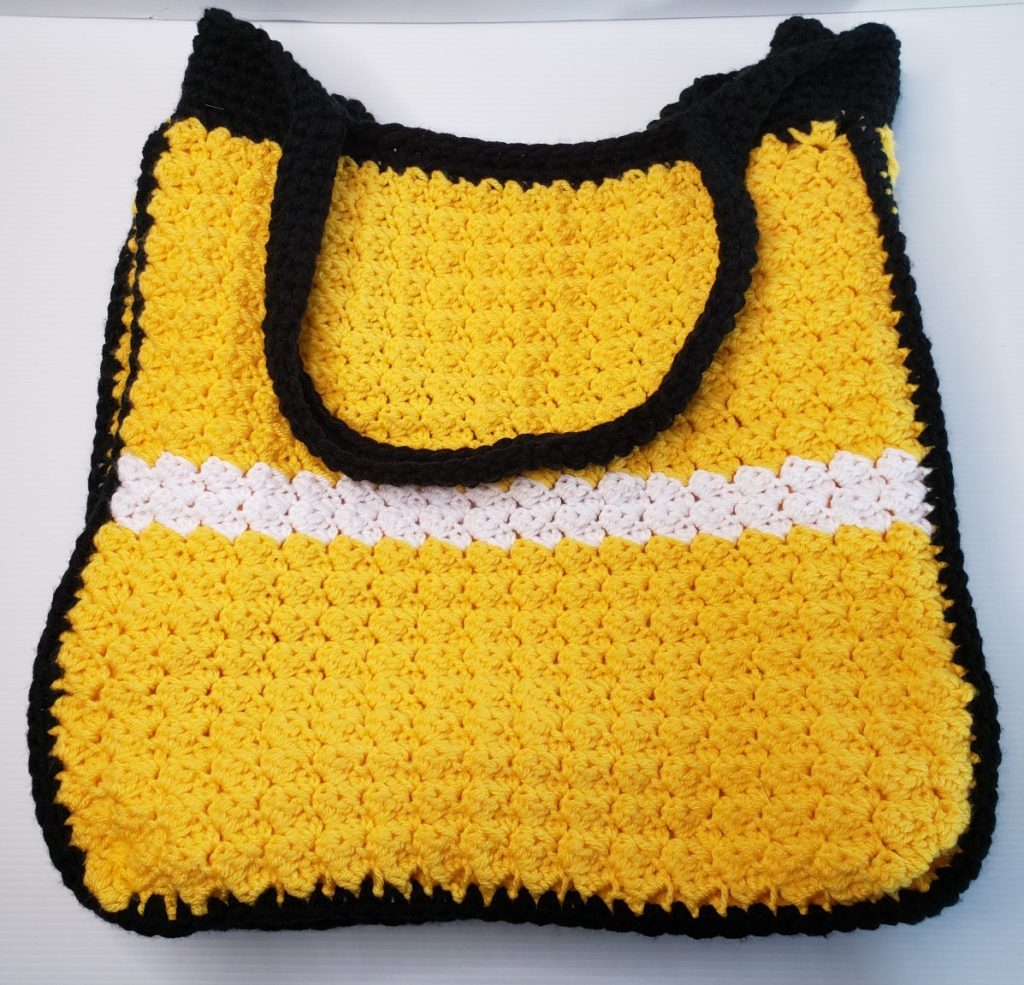
The Springtime Crochet Bag is a fun and easy crochet bag pattern.
This crochet bag is made using the sedge stitch which creates a beautiful pattern. The sedge stitch consists of a sc, hdc, and dc worked together. Once I had the pattern down, it worked up very quickly.
The crochet bag pattern uses worsted weight yarn. For my bag, I used Hobby Lobby’s I Love This Yarn. It is a softer yarn and has a lot of stretch which makes it perfect to use when you visit a farmer’s market or spend the day at the beach and need to carry a lot of stuff!
Inspiration for the Crochet Bag
I’m coming off winter where I live and so I really wanted to make something bright and springy. And I love making bags because they work up so quickly. For the bright and springy colors, I have always loved how yellow, white, and black look together. When my daughter was 6 months old, she had this cute dress that had bees on it and it was all white. I LOVED her in that outfit and that outfit is the main inspiration for this pattern that I’m excited to share with you! 😍
Now onto the pattern…

You can see a free copy of the crochet bag pattern below or if you’d like a PDF printable with step by step instructions of the pattern you can get it from my Etsy shop here.
Step by Step Tutorial for the Crochet Bag
***This post begins with the step-by-step tutorial; please keep scrolling DOWN for the free crochet pattern with everything written out**
The bag consists of 2 panels and a gusset that are stitched together. The bag is rounded off by an edging on top that also incorporates the handles.
Panels and gusset crochet instructions
To begin, I started with a 5mm hook and crocheted a series of chain stitches. Please note that this chain will be the length of your bag, so you can adjust as needed but it needs to be in a multiple of 3.

Next for row 1, you’ll skip 2 chains (ch) which counts as 1 single crochet (sc). Then half double crochet (hdc) and double crochet (dc) in the 3rd ch from the hook.

Now skip another 2 ch. In the next stitch, you’ll do a sc, hdc, and dc in the same stitch. You repeat this pattern until 3 ch are left.

Now you will skip the last 2 ch and do 1 sc in the last ch in the row.

Row 1 complete!
Starting with row 2, you will ch 1 which counts as 1 sc throughout the pattern. And then you will work a hdc and dc into the next stitch.

Now you will skip 1 dc and 1 hdc stitch. In the next stitch (sc stitch) you will work 1 sc, 1 hdc, and 1 dc. You will continue skipping the dc and hdc stitches and work the sc, hdc, and dc into the sc stitch from the row below across the row. Please note throughout the pattern, you will be working in the sc stitches and skipping the hdc and dc stitches.
You will repeat row 2 until your panels and gusset are the size needed.
Bag assembly
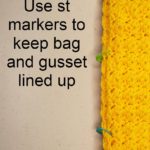
For the bag assembly, you’ll be pinning together the front panel and gusset together with the wrong sides facing. I used stitch markers to keep everything lined up.
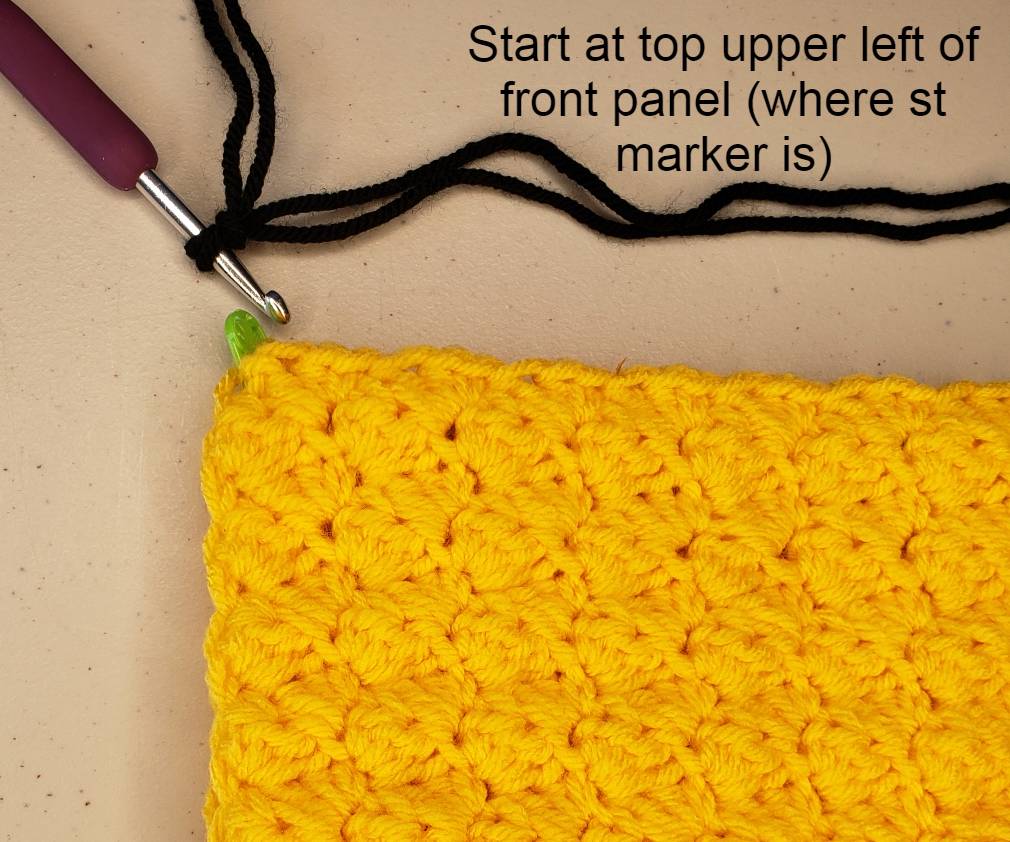
Now with 2 strands of the color you’ll be using for edging (in my case, I used black), you will start with a slot stitch in the upper left corner of the front panel. You will the use a sc (making sure you go through both the panel and gusset) down the left side, across the bottom and up the right side of the panel and then finish off. You’ll repeat these same steps for the back panel and gusset.
Top edging and handles
The top edging will consist of 7 rounds using 2 strands of the color you used to do the edging (I used black for my bag).
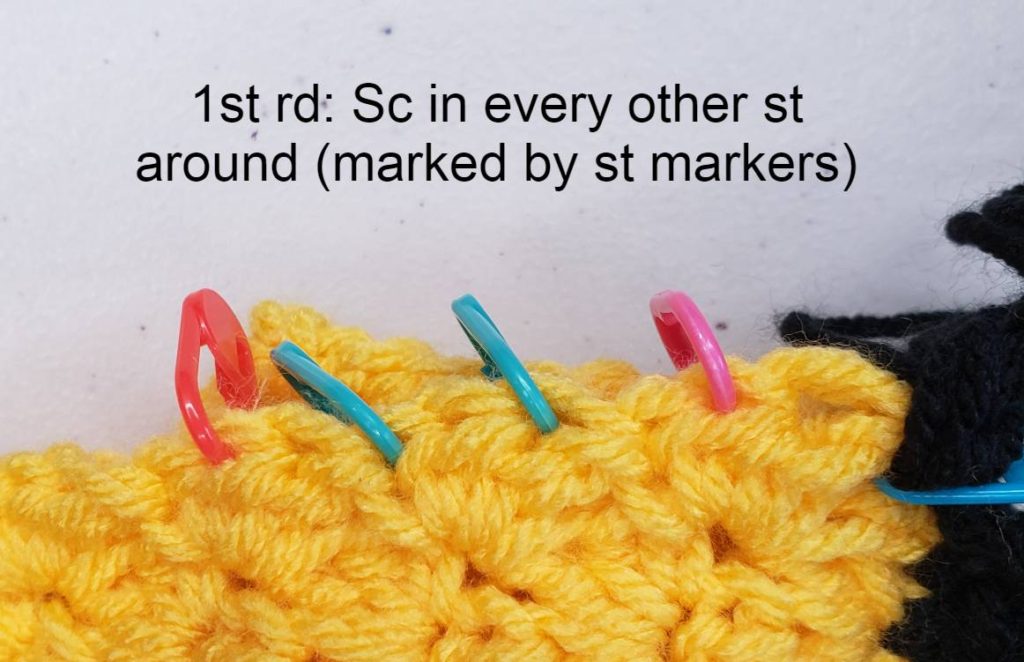
For round 1, you’ll start in the far right corner of the front panel. I suggest placing a stitch marker there so you know where you began. With the 2 strands of your edging color, you’ll be doing a sc in every other stitch around the top of the bag. This will help with tightening up the top of the bag.

For rounds 2 and 3, you’ll be doing a sc in every stitch around the top of the bag.
Round 4 is where you’ll begin making handles. (Please note the numbers I include here are based off the size of the bag I have and may change if you adjust the bag smaller or larger. You want to ensure the stitches you skip are centered for each side of the panel) So start with sc 9 and then you’ll be skipping 13 stitches. You’ll chain 50 (handle). Now you’ll sc 26 and then skip another 13 and chain 50 (to make the other handle). And you’ll finish off the round by doing sc 22 more stitches.

For rounds 5 through 7, you’ll just be doing a sc in every stitch around the top. And finish off.
That’s it – you have completed the bag!!
You can see a free copy of the pattern below or if you’d like a PDF printable version of the pattern you can get it from my Etsy shop here.
Pattern Instructions
CROCHET / SKILL LEVEL
Easy
MATERIALS
Size: US H/8 (5 mm) crochet hook
Hobby Lobby ® “ I Love This Yarn®” 7 oz / 199g; 355 yds/325m
Color A: 2 skeins 210 Antique White
Color B: 1 skein 330 Yellow
Color C: 2 skeins 30 Black
Notions: Yarn Needle, stitch markers
ABBREVIATIONS
Ch = Chain(s)
Dc= Double Crochet
Hdc = Half Double Crochet
Rd(s) = Round
Rem = Remaining
Rep = Repeat
RS = Right Side
Sc = Single Crochet
Sk = Skip
Sl st – Slip Stitch
St(s) = Stitch(es)
Tog = Together
WS= Wrong Side
Yoh = Yarn over hook
MEASUREMENTS
Height (not including handles): 14”
Length: 15”
Width: 5.5”
GAUGE
4” (10 cm) = 11 rows X 15 sts
PATTERN INSTRUCTIONS
Notes:
- To join colors, work to last loops on hook of last st. Yoh with new color, draw through rem loops and proceed.
- Sedge stitch consists of a sc, hdc, and dc in same st.
- Bag gusset is in the same stitch pattern as the front and back panel.
- The first row of top edging will be a sc in every other st to help tighten up the top of the bag. All other rows are a sc in every st.
Bag Panels (make 2)
FOUNDATION ROW: With color A, Ch 57.
ROW 1: (RS) Sk 2ch (counts as 1sc), [1hdc, 1dc] into next ch. *Sk 2ch, [1sc, 1hdc, 1dc] into next ch; rep from * to last 3 ch, sk 2ch, 1 sc in last ch, turn. (55)
ROW 2: Ch1 (counts as 1sc), [1hdc, 1dc] into next st, *sk [1dc, 1 hdc], work [1sc, 1hdc, 1dc] into next sc; rep from * to last 3 sts, sk [1dc, 1hdc], 1sc in ch-1, turn. (55)
ROW 3-18: Rep row 2. Change to color B in last st in row 18.
ROW 19-22: Rep row 2. Change to color A in last st of row 22.
Row 23-40: Rep row 2. Finish off.
Bag Gusset (make 1)
FOUNDATION ROW: With color A, Ch 24.
ROW 1: (RS) Sk 2ch (counts as 1sc), [1hdc, 1dc] into next ch. *sk 2ch, [1sc, 1hdc, 1dc] into next ch; rep from * to last 3 ch, sk 2ch, 1 sc in last ch, turn (22)
ROW 2: Ch1 (counts as 1sc), [1hdc, 1dc] into next st, *sk [1dc, 1 hdc], work [1sc, 1hdc, 1dc] into next sc; rep from * to last 3 sts, sk [1dc, 1hdc], 1sc in ch-1, turn (22)
ROW 3-115: Rep row 2. Finish off.
Bag Assembly
- Pin Front and Gusset tog with WS facing; line up rows on side and bottom of bag and use st markers to help keep lined up..
- Join 2 strands of color C with sl st on the left side. Working through both thicknesses, use sc down the left side of the bag, across bottom, and up the right side. Finish off.
- Rep for Back panel.
Top Edging and Handles
Rd 1: Starting in the far right corner on the front piece, place a stitch marker to mark the beginning of the round. With 2 strands of color C, sc in every other st across the top of the bag to complete a round.
Rd 2 -3: Sc in every st around the top of the bag.
Rd 4: (Begin making handles): Sc9, sk 13 st, ch 50, sc26, sk 13, ch50, sc22.
Rds 5-7: Sc in every st around the handles and top of the bag. Finish off.
Permissions + Copyright:
Please do not publish or share this pattern as your own. You may make items to sell with this pattern. In exchange, please link back this post. Do NOT use my photos as your own sales photos.
I would love to get your feedback since I’m new pattern designing! Reach out with any questions or comments.
Have an amazing day!
Heather
If you like this crochet pattern and want to stay connected, sign up for my newsletter!